
 *Important Notice : 1) Always start new layer when filling in new element (lines, color, text etc.)
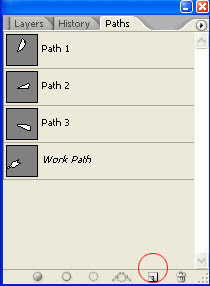
 2) Remember to create new paths-layer for each path/line whenever using the Pen tool (shortcut P)
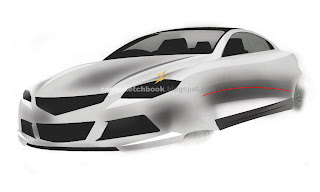
 Fill the base color first by using Bucket tool (shortcut G). In this case 25% gray for the body and full black in all the openings (headlights, grille etc.). Not to forget 55% gray for the interior.
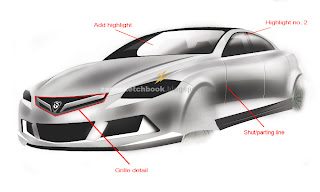
 Identify the car's highlights. Fill them in with 15% gray to represent the highlights.
 Now fill in more black to the interiors such as seats and the steering wheel. Then using brush tool (shortcut B) apply black lightly (Opacity lower than 50%, Flow lower than 40%) to indicate the shadow n the contour of the car's body.
 Add darker black to create depth. * always create new layer every time you fill in new shades - easier to modify them later on.
  Using path tool (shortcut P) create an arch that represent..well..wheel arch of course. Create new path-layer (1&2-refer top)
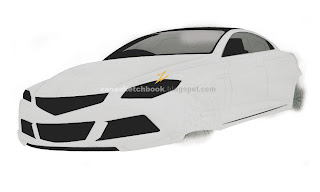
 Now its start to look more understand-able car. Add details such as 'parting' lines, emblem and more highlights. These small details will give your renderings look more 'alive'.
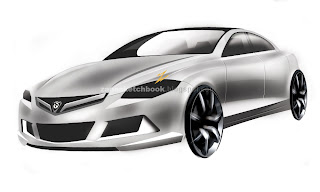 Now add some wheel that you can crop from any website you can find. Try to get a similar angle/perspective image for easier application on your rendering. The car still look hanging at this stage.
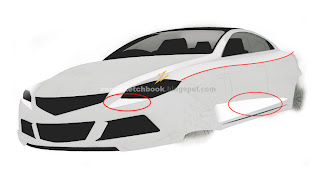
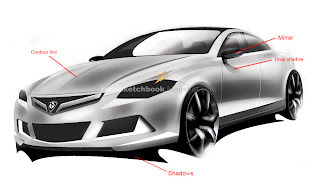 Now add ground shadows to create the car's stance. Add more details such as wing mirrors & its shadow on d front door. Again wing-mirror can be crop from 'real' car that have the similar angle/perspective. Adjust them by using Ctrl+T (free-transform mode) to get the right angle.
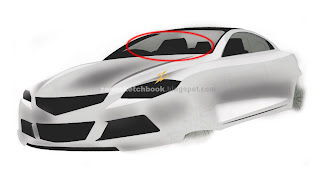
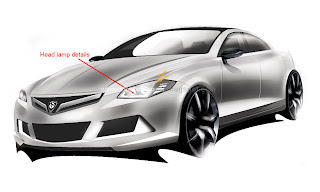 Almost done here. Add details on d headlamp to give it some 'eye'. Heh.
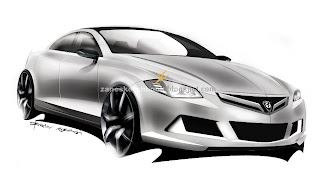 And we're done!! Really..this is not a necessary step. But by reflecting ur sketch u can check whether ur sketch is in right perspective or not..and don't forget to sign them!

 Fill the base color first by using Bucket tool (shortcut G). In this case 25% gray for the body and full black in all the openings (headlights, grille etc.). Not to forget 55% gray for the interior.
 Identify the car's highlights. Fill them in with 15% gray to represent the highlights.
 Now fill in more black to the interiors such as seats and the steering wheel. Then using brush tool (shortcut B) apply black lightly (Opacity lower than 50%, Flow lower than 40%) to indicate the shadow n the contour of the car's body.
 Add darker black to create depth. * always create new layer every time you fill in new shades - easier to modify them later on.
  Using path tool (shortcut P) create an arch that represent..well..wheel arch of course. Create new path-layer (1&2-refer top)
 Now its start to look more understand-able car. Add details such as 'parting' lines, emblem and more highlights. These small details will give your renderings look more 'alive'.
 Now add some wheel that you can crop from any website you can find. Try to get a similar angle/perspective image for easier application on your rendering. The car still look hanging at this stage.
 Now add ground shadows to create the car's stance. Add more details such as wing mirrors & its shadow on d front door. Again wing-mirror can be crop from 'real' car that have the similar angle/perspective. Adjust them by using Ctrl+T (free-transform mode) to get the right angle.
 Almost done here. Add details on d headlamp to give it some 'eye'. Heh.
 And we're done!! Really..this is not a necessary step. But by reflecting ur sketch u can check whether ur sketch is in right perspective or not..and don't forget to sign them!
If you need more hands-on guidance, feel free to email me or send your SKETCH to zaeneticts@yahoo.com for rendering tips n guide.
ReplyDeleteWe want more!!!
ReplyDeleteIncomiiiiinng!!!!
ReplyDeletewe still want more!!!
ReplyDelete